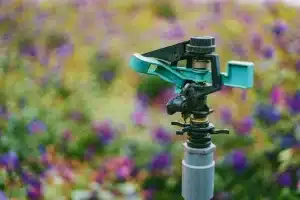
If your yard has an automatic sprinkler system, there is a chance that you have already experienced dealing with a broken sprinkler head at one point or another in the past. Broken or damaged sprinkler heads are often the result of different reasons although the most common one is when the heads poke too far outside the ground and a lawnmower accidentally runs over them. Good thing that fixing it is easy and anyone can do it. So, how do you replace a sprinkler head, then?
Steps to Fix and Replace a Broken Sprinkler Head
Replacing a sprinkler head is no doubt one of the simplest and easiest fixes as far as sprinklers are concerned. This process will just take a few minutes of your time and is also a cheap project that you can do on your own. Here are the simple steps you need to follow:
1. Turn off the water system.
Prior to starting the installation of the sprinkler head replacement, first, you have to ensure that you have shut off the water system properly. Failure to shut off the water system before the replacement process will make you end up dealing with water spraying everywhere.
2. Dig a hole around the broken part.
After you have shut off the water supply, it is time for you to dig up the issue. You have to dig a hole that is usually 6 inches in diameter and 1 foot deep around the sprinkler head with the use of a shovel. Put the sod safely out of the way for you to return it to its place once the replacement process is finished.
3. Dig down to the riser.
When you have finished digging all the way down to the riser, this is when you should stop. Make sure that you are extra careful when digging so you don’t end up damaging your sprinkler system. The riser refers to the vertical pipe branching off the mainline. After you reach the pipe, you should stop digging right away.
4. Remove the old sprinkler head.
It is the important step in the process. Turn the sprinkler head to the counterclockwise direction to take it off. Most of the time, you might need to pull out a pliers or wench to help you remove the head.
5. Attach the replacement sprinkler head.
Attach the new sprinkler head to the riser then turn this clockwise. See to it that you install and tighten it properly.
6. Check the system before you fill the hole.
This last step is very important. Make sure that the system gives a satisfactory spray before you do the final cleanup. This way, you can save yourself from the need to dig up your sprinkler again in case there is a problem with the system.
Replace the Sprinkler Head the Easy Way
Now that you have learned the steps to replacing sprinkler heads, you will surely notice that the process itself is quite easy and simple. While some might not find it that easy, this task is often something that you can do quickly. If you notice a problem with your sprinkler heads, make sure you replace them right away to avoid more serious issues down the road.